Friday, January 18, 2013

Tournament Culture in the Low Countries and England | Mario Damen -

(2) Tournament Culture in the Low Countries and England | Mario Damen - Academia.edu
Whereas tournaments of the late thirteenth century were infused with cross-channel contact, whether in reciprocity of form or in the international composition of the participants involved, by the early fifteenth century, tournament forms... more
Whereas tournaments of the late thirteenth century were infused with cross-channel contact, whether in reciprocity of form or in the international composition of the participants involved, by the early fifteenth century, tournament forms in England and the Netherlands had significantly diverged. As has been thoroughly explored by recent historians, English tournaments became increasingly socially exclusive, whilst retaining an international dimension in the interests of diplomacy. However, this essay demonstrates that this development was by no means typical of all late medieval tournaments. The case of the Low Countries demonstrates that the more socially inclusive style tournaments did continue into the fifteenth century, and provided an opportunity for the ducal household and noblemen to come into contact with patrician townspeople and even more diverse urban audiences.

148
Download (.pdf)
Social Sharing is off.
This story is not in your Timeline.Post story to your Timeline.
247
ournament Culture inthe Low Countries and England
Mario Daen
I 1279 Jh I, duk  Bbt, tvlld t Egld t g  mg hs s wth Mgt, dught  Kg Edwd I.
1
Accdg t thchcl J v Hlu th duk dlbtly sught ut tumts dchvlc gms (
tornoy ende eeste
) d h ws t dspptd. A tu-mt ws gd, pbbly t Wds, wth th yl cupl s th mstmptt spctts. But wh th tm cm t dvd th tms, t mgdtht th duk’s
conroi
ws sht   w tuys. T Qu El Cstl dcdd tht sx bts, ‘th bst  th t cuty’, pb-bly wth th tus, shuld j th duk’s tm. Hwv, ccdg tV Hlu, t ws cmmly kw tht  culd t bt th duk  Bbt v wthut qul umbs. At th tumt ‘yug d ld,bth kghts d hlds’ spk  th duk’s pmc d hs chvlcdds, ll  whch csd hs hu d pstg d lly pducd thmg llc t whch h spd.
2
T mg ws ccludd  July1290 d ws pcdd g by  bg tumt, pbbly  Rud bl,ths tm t Wchst d wth th ptcpt  Edwd’s pspctvs--lw, th utu Jh II  Bbt, wh by th hd ldy bstyg t Edwd’s cut  v ys.
3
Jh I dd t  tumt  B-l-Duc  1294, gsd  th ccs  th mg  th duk  B wth El, th dught  Edwd I. Numus Eglsh kghts
1
Ts tcl ws wtt wth th mwk  th sch pgmm ‘BugudNblty, Pcly Pltcs d Nbl Fmls, 1425–1525’, cd by th NthldsOgst  Sctc Rsch (NWO).
2
Rijmkroniek van Jan van Heelu betreende de Slag van Woeringen van het jaar 1288
,d. J. F. Wllms (Bussls, 1836), vss 896–950 (s ls th dgtl dt t www.dbl.g). S ls W. v Aj,
Spiegel van ridderschap: Heraut Gelre en zijn ereredes
(Amstdm, 1990), p. 16.
3
M. Bddl,
King Arthur’s Round able: An Archaeological Investigation
(Wdbdg,2000), pp. 361–2, 372.

Tuesday, January 15, 2013

How to make a medieval tent.

How to make armour

How to make a Medieval Pavilion - single pole 12 spoke


PLANNING

Determine size and shape. The width of the fabric should be taken into account when determining the size. Plan for one or two center poles, the slope of the top, and how many other poles with placement. Poles are commonly placed a maximum of 6 feet apart at the perimeter. If you plan to add walls later on, you'll want to think about placing the poles no farther apart than 4 to 5 feet. The style of pavilion will also dictate where the poles are.

What color(s) do you want?

Not all fabrics come in the colors you might want, and canvas is fairly restricted in colors. Remember to visualize the colors together or you might end up with something that looks like a giant fruit or bruise on your favorite fighter.

What dag shape did you want?

square, rectangular, keyhole, triangular, heater. Make a template of the dag style you want. Dags on average are commonly 12 to 16 inches long and 12 inches wide.
Make a drawing of size and shape, two views at least. Then make a setup drawing of pavilion, showing how it would look on the field. 5) Make a cutting plan. This helps if you have a non-rectangular shape.
Optional items. Painting on dags and/or Top. Backdrop. Floor. Barrier. Break-down or single piece poles. And waterproofing. Backdrop, Barrier, and Floor Covering.
Items needed:

Yardstick, Tape Measure, and a long straight edge. Chalk and Pencil.
Pavilion drawings and Templates.
Dag Template.
Scissors, sharp.
Sewing Machine. An old steel one works best with Duck and Canvas.
Fabric (with 2 yds extra).
Lots of thread, about 900 yds worth for a 10'x15' Oval. Use a cotton covered polyester thread for strength.
Poles and steel rod, Grommets and leather, Parachute Line, Stakes, and Line Tighteners.
Optional items: paint, waterproofing, designs to paint.
Order of Construction


PRE-SHRINKING

The fabric needs to be pre-shrunk, otherwise it will shrink funny after the first time it gets wet. For the larger pavilions you will need to run a test piece through the washer and dryer, measuring before and after to figure out the percent shrinkage. Allow for the shrinkage if you cut out the pieces before washing. Sometimes you will need to iron the fabric after drying.


CUTTING

Cut the pieces out of fabric, remember to allow 1 inch seam allowance for each fabric piece. Using cutting layout if you have it. When cutting out dags, fold fabric in quarters so you can get more dags with less cutting. If dags are symmetrical, then you can waste less material. Dags only need 1/2 inch seam allowance. Here you would also cut out the pennants for poles. IMPORTANT: Be sure to track which piece goes where before you start sewing. Any painting of dags and pennants are done now.

SEWING

Pin the pavilion pieces together for sewing.Start with the seam in the center of the pavilion and work outward. Make sure all the seams are getting sewn on the same side out. Use a French or Jean seam. The dags and pennants are sewn with the painted surface inside to be turned right-side out. After the pavilion top is sewn all together, start sewing the dags on. The dags should sewn on so the side it face out is against the top side of the pavilion. Use the same French or Jean seam on connecting dags to pavilion top, then sew again around the seam.


POLES

Either machine or hand sew leather squares on the pavilion where the grommets are going. The leather pieces need to go on the bottom side of the pavilion. Then put the grommets in. Now the Top is done. Make your poles to the height you wanted. Remember to make the center pole(s) to the height you planned for. Drill the holes in the poles for the pennant rods. Cut the rods long enough for the hole depth plus pennant height and 3 inches. Paint the poles if you wanted. If you paint, use an oil based paint for durability and make sure you also paint the ends. Make the line tighteners out of dowel rod or old broom handles.

FINISHING

Now your pavilion can be setup and used, or you can waterproof it now. A note on waterproofing: Only immersion and brushing methods truly get the waterproofing into the fabric.

Suggested Fabrics:
Roof - Canvas, 10oz. Duck, Trigger, Sportsweight, and Silk.
Backdrop/Barrier -Canvas, Duck, Sportsweight, Broadcloth, Sheeting, and Silk
Dags - Broadcloth, Sheeting, and Silk (for flapping in the breeze.)

How to make armour

How to make armour


Choose the design that best suits you the best. A few years ago, finding anything about trebuchets was pretty difficult, but these days there are many websites and several books that offer detailed building plans.

Draft the trebuchet's front, side and top view. The drawing must be to scale. This way you will have a clear idea what the finished project will look like and how much space it will occupy.

Draft plans for each of the trebuchet's components. A trebuchet consists of six basic components: base frame, upright supports, runway, swinging arm, counterweight bucket and sling.


Building the Base Frame


Put on your safety goggles. Cut three four-by-fours to a length of 4 feet on your table saw. Put the leftover 2-foot pieces to the side. One of the four-foot pieces is the base frame's front, another its back and the last one its central parallel brace.

Cut the leftover 2-foot pieces into four 1-foot long pieces on the table saw. Cut one four-by-four into two 4 foot long pieces. Place one of them to the side. Cut the remaining one into four 1 foot long pieces. You now have eight 1 foot long sections of four-by-four. Set the table saw's frame to a 45 degree angle. Cut off both corners of each 1-foot piece so that you have eight trapezoids with a 1 foot long base. These are the base frame's corner support braces.

Return the table saw's frame to the original setting. Set the blade's height to 1 3/4 inches. That's half a four-by-four's width. Cut the 4 foot long pieces at 3 1/2 inches and 44 1/2 inches. The frame will be put together with lap joints, so you're not cutting all the way through the lumber. Make four cuts into the 6-foot lengths: at 3 1/2 inches, at 34 1/4 inches, at 37 3/4 inches and at 68 1/2 inches. Make three additional cuts at equal intervals between the two cuts in the center. Punch out those central sections with the wood chisel and mallet.

Set the band saw's fence to 1 3/4 inches. Cut the ends of the 4-foot and 6-foot lengths so that each lumber's end has an L-shaped section cut out. All L-shapes must be on the same side.

Place the base frame's sides on top of the front and back end pieces and the central parallel support. Attach a Phillips head drill bit to your power drill and secure each joint with four 3-inch deck screws. Position the diagonal braces at the base frame's corners and to each side of the central parallel support. Secure each diagonal brace with 3-inch deck screws.

Building the Runway


Set the table saw's fence to 4 inches. On the table saw, cut one of the dimensional lumbers lengthwise. These two sheets are the runway's sides.

Make pencil marks on the base frame's front, back and central parallel support at exactly 20 inches and 28 inches. Align the 8 inch wide dimensional lumber with the pencil marks. Make sure it is precisely parallel with the base frame's sides. This is crucial to the finished trebuchet's accuracy. Secure it to the base frame with deck screws.

Cut six right-angled squares with 4 inch sides from your wood scraps. Secure these triangles with nails to the runway side pieces at 2 inches, 36 inches and 70 inches. Make sure that the right angles are all on the same side.

Place the runway side pieces against the 8 inch wide dimensional lumber. Fasten the triangular support brackets to the base frame with nails.

Buiding and Securing the Upright Supports


Cut six pieces of four-by-four to a length of 2, feet 9 inches on the table saw. Put two of these pieces to the side. These are the upright supports. The other for pieces are the support braces. Set the table saw's fence to a 135 degree angle. Cut the support braces along the top. Set the table saw's fence to a 64 degree angle. Cut the support braces along the bottom.

Draw a pencil line across the top of each upright support at 1 3/4 inches. Carry that line over to each of the support's sides. The line needs to drop down 1 3/4 inches. Mark the end of each line with an "X". Attach a drill bit to your power drill. Drill straight through the lumber, making sure you drill through the center of each "X." Attack the keyhole bit to the drill. Using the hole you just drilled as a pilot, drill as deeply into the wood as you can from both sides. You won't be able to cut entirely through the lumber. Punch out the center with the mallet. Remove all splinters with the wood rasps.

Make a pencil line across the upright support's top portion at 1 3/4 inches. That's halfway across the circle you just punched out. Cut off the top section on the band saw along this line.

Making the Axle and Swinging Arm


Draw an "X" across each end of your 4-foot four-by-four. With the compass, draw a 1 1/4 inch circle at the center of each "X." Draw a pencil line 3 1/2 inches from each end across all four sides of the lumber. Cut an octagonal shape around each circle's perimeter to the 3 1/2 inch line. Punch out the pieces around the octagon with the chisel and mallet. Round off the edges with the wood rasps so that you have perfect 3 1/2 inch cylinders on each end.

Set the table saw's blade to a height of 1 3/4 inches. Make cuts at 21 1/4 inches and 23 3/4 inches. Make three additional cuts at equal intervals between these cuts. Punch out the center sections with the chisel and mallet.

Cut a four-by-four to a length of 5 1/2 feet on the table saw. Set the table saw's blade to a height of 1 3/4 inches. Make a cut at 27 inches from the swinging arms front end and another at 30 1/2 inches. Make three additional cuts at equal intervals between these t two cuts. Punch out the center sections with the chisel and mallet.

Cut a 1 inch wide, 1 inch deep mortise into the swinging arm's back. Make the cuts on the band saw. Punch out the center with the chisel and mallet. The mortise must be vertical, not horizontal. Drill a hole through the swinging arm 1/2 inch from the top and 1/2 inch from the back, so that it punches through the entire mortise. Fasten a 3/4 inch eye hook to the top of the swinging arm, 1 inch below the mortise.

Building the Counterweight Bucket and Attaching the Aiming Pin


Place the 3 1/2 inch wide dimensional lumber on the table saw. Cut two 1-foot lengths, one 1 1/2-foot length and two 7 3/4 inch lengths. Cut the plywood to two rectangles, 1 foot x 1 1/2 feet.

Center one of the 1 1/2 foot long dimensional lumbers on the swinging arm's front end. Secure it with three 3 inch deck screws. This is the bottom of the counterweight bucket. The plywood rectangles are its sides. Secure them to the swinging arm and bottom with 3 inch deck screws at 2 inch intervals. Secure the 1 foot long lumbers to the bucket's front and back in the same manner.

Attach the 1 inch keyhole bit to the drill. Drill out a 1 inch wheel from the 1 inch thick dimensional lumber. Attach a 1/2 inch drill bit to the drill. Drill a 1/2 inch deep hole onto the wheel's side. Place the dowel into the hole and secure it with wood glue.

Place the wheel into the mortise at the end of the swinging arm so that the dowel points up. Secure it with a 4 inch bolt, two washers and a nut.

Final Assembly


Cut two 4 1/2 foot lengths of nylon rope. Cut an 16 inch long, 6 inch wide diamond from the denim cloth. Tie the diamond's front corner to one length of rope, the back corner to the other. Secure one nylon rope to the swinging arm's eye hook. You now have one free end of nylon rope. Tie this end into a 1 inch hoop. This hoop will hook onto the aiming pin when the trebuchet it loaded and ready to fire.

Place the axle onto the upright supports. Replace the upright support tops and fasten them with straight brackets and 1/2 inch wood screws. Make sure the axle can move freely before tightening the screws. Hang the swinging on the axle, mortise to mortise. Drill four holes through the mortise joint. Fasten the swinging arm to the axle with four 4 inch bolts, washers and nuts.

Fill the counterweight bucket with cat litter. Secure the two 7 1/4 inch pieces of dimensional lumber to the bucket's top with 3 inch deck screws.

Fasten a 3/4 inch eye hook to the top of the trebuchet's left runway rail, 6 inches from the trebuchet's rear. Cut a 6 foot length of nylon rope. Drill a hole into the center of each runway rail, 6 inches from the rear. This is the trebuchet's firing mechanism.

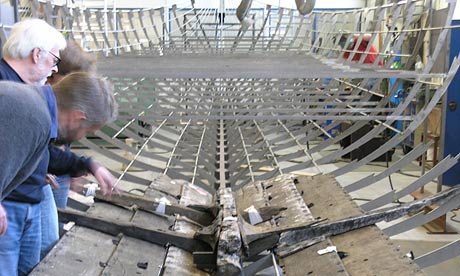
Good Luck - Result will look like the below photo


How Things Work : How Does a Trebuchet Work?


Possible 9-foot model of Brunelleschi’s dome found

The History Blog » Blog Archive » Possible 9-foot model of Brunelleschi’s dome found

Possible 9-foot model of Brunelleschi’s dome found

Archaeologists excavating inside an 18th century theater slated to become an addition to the Museum of the Works of the Cathedral in Florence have discovered what appears to be a builder’s model of the cathedral’s famous dome. The mini-dome is nine feet in diameter and features bricks laid in a herringbone pattern, a unique characteristic of the dome designed and built by architect and engineer Filippo Brunelleschi.
It was found in a layer two-and-a-quarter feet below surface level which contains copious metal and marble fragments from the period when the space was used as a construction workshop during the late 14th and 15th centuries, the same time when Brunelleschi was working on his dome. Herringbone brickwork had been used before in Persian domes, but Brunelleschi’s was the first in Europe, which means this model may be the first brick herringbone dome built on the continent.
The dome of Santa Maria del Fiore was built between 1420 and 1436, and the herringbone pattern was one of the key elements to Brunelleschi’s brilliant design. An octagonal dome had been planned for the cathedral by Arnolfo di Cambio in 1296, but even as the rest of the church was built, the dome never moved past the model phase. The decision to eschew Gothic buttresses in favor of a classical dome was made when the design of architect Neri di Fioravante was accepted in 1367. That left the Duomo’s builders with a dilly of a pickle: how to build a huge octagonal dome without elaborate scaffolding that would make the interior of the church unusable and without exterior buttresses.
In 1418 the wool guild sponsored a contest to solve the thorny problem. Brunelleschi studied the dome of the Pantheon in Rome — still today the largest unreinforced concrete dome in the world — but he couldn’t use the Pantheon’s techniques for the Duomo dome. The Roman recipe for concrete was lost, for one thing, and for another, it had required massive wooden forms to keep the dome standing while the concrete dried. There literally wasn’t enough timber in Tuscany to scaffold and frame even a masonry dome 144 feet in diameter. Also the outer walls of the cathedral had already been built, and there was no way they could withstand the compression forces of a massive, heavy dome. Besides, there was still the stricture that the interior of the church had to be open to the public during construction.
Brunelleschi’s solution was brickwork rather than concrete or stone. He built wooden vertical ribs that curved upwards from each corner of the octagonal base. The ribs had slits that wooden planks could be attached to, and then terrifying skinny platforms built off the planks for workers to use building the dome without the need for scaffolding. The bricks were then laid in a diagonal herringbone pattern that would transfer the weight of the bricks to nearest vertical rib while the mortar was drying instead of pressing downwards and collapsing onto the heads of assembled worshipers.
Even today there are many questions about how he accomplished this extraordinary feat of architecture. Brunelleschi kept his overall plan close to his chest, releasing snippets on a need-to-know basis so he couldn’t be easily replaced. The discovery of a brick and mortar model (as opposed to the small mock-up style model which is on display at the Museum of the Works of the Cathedral) could add to our understanding of Brunelleschi’s methods.
Unfortunately the top of the mini-dome is missing, probably sheared off during the construction of the theater in 1779. The theater was commissioned by the Grand Duke of Tuscany Peter Leopold, son of Maria Theresa of Austria and future Holy Roman Emperor. It replaced the many workshops used by artisans and craftsmen employed by the Works of the Cathedral since the Middle Ages, one of which may well have been the place where Michelangelo sculpted the David. The Theater of the Intrepids became known for its low-brow entertainment, raucous audiences and wholly crappy acoustics.
In the 1900s the theater was gutted and used as a garage until it was purchased by its former owners, the Works of the Duomo, in 1998. For the next decade or so, the organization used it for storage and as a restoration laboratory. In 2009, construction began to transform the space into an adjunct space for the museum. The new addition is scheduled to open in 2015. The newly discovered domelet will be fully excavated, restored as much as feasible and put on display in the new museum.

Building scale.

Subscribe to our YouTube channel. Sauron commands it. http://bit.ly/X5bAam

Art by Boxmang: http://boxmang.deviantart.com/#/d4xvgpm

Shared by Boicho Husha
How things size up.

Sunday, January 13, 2013

Game Of Thrones Season 3: Three-Eyed Raven Tease


1000-year-old Sri Lankan temple step found in Devon garden

The History Blog » Blog Archive » 1000-year-old Sri Lankan temple step found in Devon garden

Imagine an elder sign or portal stone kepted unknown in someones garden until the stars are right.

1000-year-old Sri Lankan temple step found in Devon garden


A Sandakada pahana, a beautifully carved semi-circular granite slab which a thousand years ago graced the entrance to a temple in Anuradhapura, a sacred Buddhist city and a capital of Sri Lanka from the 4th century B.C. to the 11th century A.D., has been found in the garden of a modest bungalow in Devon. Sam Tuke, an appraiser at Bonhams, happened to hear about it from a woman who was in the office picking up something else. When she mentioned the elaborate carvings of animals which she had loved tracing with her fingers since she was a small child, the expert was intrigued. The client brought him a picture of it the next day and he realized it was something special.
It is so special, in fact, that it’s one of only seven of its kind. The other six are all still the first steps to stupas (spired dome temples representing the enlightened mind of the Buddha) in Anuradhapura. The tradition of the elaborately carved first step goes all the way to the dawn of Buddhism. According to tradition, the practice began in India when the Buddha was still alive. A devotee had covered the floors of the temple he had built with expensive, richly patterned cloths. When another devotee wanted to do the same, Ananda, the Buddha’s personal attendant and first cousin, suggested she place them at the base of the temple steps. From then on, the first step would be a beautiful art work.
In Anuradhapura, this tradition took the form of carved stones. Sandakada pahana means half-moon stone in the Sinhala language and indeed all the steps are semi-circular in shape. The designs carved within the half-moon are laden in Buddhist symbolism, representing the life of the Buddha and the cycle of Samsara (birth, life, death and reincarnation). Within the half-moon are concentric half-circles carved with Buddhist symbols. In the center is a half lotus in bloom. The lotus represents purity of spirit as it floats unblemished above the mud of earthly attachment. When the Buddha was born, he took seven steps and at each step a lotus flower blossomed.
The next band is a line of geese (some call them swans, but swans aren’t native to the region and the creatures don’t have long necks). Geese are considered examples of ideal qualities — they aren’t vainly adorned like peacocks but they can fly to much greater heights, their migration shows a lack of attachment to home, they make pleasing sounds — and the Abhiniá¹£kramaṇa SÅ«tra tells the tale of a young Prince Siddhartha saving a goose which had been shot with an arrow by his cousin and nursing it back to health.
After the geese is a band of foliage called a liyavel, a stylized design symbolizing worldly desires, and after that is a parade of four animals: elephant, horse, lion and bull. They follow each other in that order representing the four phases of Buddha’s life.
The elephant represents the Buddha’s birth and growth. One night before he was a twinkle in her eye, his mother Queen Maya dreamed that a white elephant holding a lotus flower in its trunk walked around her three times then entered her womb. The white elephant, symbol of mental strength greatness, was the Buddha himself returning to life in his final incarnation as Prince Siddhartha. The horse represents energy and effort in the practice of dharma. Buddha rode his horse, Kanthaka, when he left the palace for good to live as an ascetic begging for alms. The lion symbolizes power and the teachings of the mature Buddha which are also known as “the Lion’s Roar.” The bull represents forbearance and the acceptance of death. An alternate interpretation of the four animals is that they represent the four mortal perils: birth (elephant), disease (lion), decay (bull) and death (horse).
The outermost band is a carving of stylized flames representing the fire of worldly existence.
The Sandakada pahanas were created towards the end of the Anuradhapura Kingdom. Sri Lanka was invaded by the Tamil Chola Empire of India in 993. Anuradhapura king Mahinda V, a weak ruler who made the fatal mistake of not paying his army, was finally captured in 1017. He was kept prisoner in India while the Chola army sacked the sacred city of Anuradhapura. They then moved the capital of Sri Lanka to Polonnaruwa tolling the final death knell of the Anuradhapura Kingdom. The city was abandoned and the jungle reclaimed the ruins.
It wasn’t forgotten, however. It had been written about extensively by ancient Roman (Pliny the Elder in Book VI, Chapter 24 of Natural History refers to the travelogue of Annius Plocamus whose servant was blown off course to Sri Lanka) and Chinese sources. In the 1820s and 30s, British colonial administrator Sir William Colebrooke describes the art and architecture of Anuradhapura, and a Sandakada pahana in particular, in glowing if Eurocentric terms.
“I saw here ornamented capitals and balustrades, and bas reliefs of animals and foliage. I cannot better express my opinion of their elegance than by saying that, had I seen them in a museum, I should, without hesitation, have pronounced them to be Grecian or of Grecian descent. One semicircular slab, at the foot of a staircase, is carved in a pattern of foliage which I have repeatedly seen in works of Greek and Roman origin.”
So how did this masterpiece of immense cultural importance find its way to a Devon bungalow? It was in the garden of the current owner’s childhood home in Sussex. Her parents had purchased the house from a tea planter in the 1950s, a tea planter would certainly have good reason to visit Sri Lanka, or Ceylon as it was then called, and in those days could easily have purchased some loot from Anuradhapura and brought it home.
When her parents died, the Sussex house was sold, but the owner of the stone couldn’t bear to leave behind a piece that had given her so much delight in the happy days of her youth. She took it with her. “The Pebble,” as the three-quarter ton, eight-foot by four-foot, six-inch-thick granite slab is known in the family, has moved with her five times since then. Now she’s parting with it for good, sadly. It will be sold at Bonham’s Indian and Islamic sale in London on April 23rd. They expect it will sell for at least £30,000 ($48,000), which seems very low to me considering its beauty and incalculable historic and cultural value.
I wish she’d donate it to a museum. It’s in such impeccable condition, which makes it even rarer than the six which remain in place since they’ve been stepped on by so many thousands of pilgrims and tourists.

Tuesday, January 8, 2013

Valkyrie Figurine From HÃ¥rby

Valkyrie Figurine From HÃ¥rby – Aardvarchaeology

Valkyrie Figurine From HÃ¥rby


Etymologically speaking, ”valkyrie” means ”chooser of the slain”. The job of these supernatural shield maidens in Norse mythology is to select who dies on the battlefield and guide their souls to Odin’s manor, where they will spend the afterlife training for the Twilight of the Gods, the final battle against the forces of chaos. After each day’s combat training, a mead-hall party with drink and reincarnated pork ensues, with the valkyries waiting the tables.
We have had very few period depictions of armed women. Instead scholars have applied the term “valkyrie” to a common Late Iron Age motif of a usually unarmed woman who offers up a mead cup or horn, sometimes standing alone, sometimes to an armed man, who is often on horseback. A more cautious term for this motif is “the greeting scene”, and there is reason to link it to beliefs about what would happen to men in the afterlife (cf. houris). But there are armed women embroidered on the tapestries from the AD 834 Oseberg ship burial, and a small group of brooches shows them in 2D relief (pictures below). Thanks to Danish amateur metal detectorists, that group is growing steadily. And now a 3D version of the motif has surfaced!
Detectorist Morten Skovsby found the first 3D valkyrie figurine late last year at HÃ¥rby on Funen. She wears a floor-length dress and has her hair in the typical knot we’ve seen for instance on the Lady of Sättuna, and she’s armed with sword and shield. The interlace decoration on the rear of her dress should permit pretty tight dating once specialists get to see it clearly, but she’s definitely from the Vendel or Viking Periods, and I’d say probably from the 8th/9th/10th century.
See also the Lejre Lady. Thanks to Jakob Øhlenschlæger for the tip-off, to Henrik Brinch Christiansen for the photographs and to Claus Feveile for additional information.
A man on a horse is greeted by a woman with a shield and a drinking horn. Brooch, Tissø, Zealand.
Brooch depicting an armed woman. Gammel Hviding, Jutland. Finder and photographer Henrik Brinch Christiansen. Drawing Claus Feveile.

10 Weird Weapons Of War

Check out this great MSN video - 10 Weird Weapons Of War

Wednesday, January 2, 2013

‘The Hobbit’: Why Does Tolkien's World Lack Women Characters?

‘The Hobbit’: Why Does Tolkien's World Lack Women Characters? | TIME.com

The Hobbit: Why Are There No Women in Tolkien’s World?


THE HOBBIT: AN UNEXPECTED JOURNEY
Warner Bros.
It has, at this point, become a bit obvious to point out the lack of female characters in children’s entertainment: the Pixar movies, the morning cartoon shows, even the Legos that they play with — unless, of course, the product in question was designed specifically for girls, which raises another set of issues about self-reinforcing stereotypes. But I was not prepared for the extreme skewing of the sexes in The Hobbit, which has been the No. 1 movie at the box office for the past three weeks.
(MORE: The Hobbit: Why Go There and Back Again?)
The film opens in the nice domestic setting of hobbit Bilbo Baggins’ cozy home. Bilbo has a story to tell his young nephew or cousin — the relationship and intermediary relatives are unclear — named Frodo. We are introduced to the plight of the dwarf king Thorin, who is identified as “the son of Thráin, the son of Thrór.” Thorin’s precious-mineral-based kingdom was ransacked and occupied by a dragon and he wants it back. A wizard named Gandalf appoints Bilbo to help and soon a whole bunch of short men show up on his doorstep. They all set off into enemy territory, and about two-thirds in we finally meet someone without a Y chromosome, an elf princess played by Cate Blanchett who can read Gandalf’s mind. Although she’s on screen for only about five minutes, I was so grateful that it didn’t even bother me that her main character trait is that she’s intuitive. I have since found out that she doesn’t even appear in the book of The Hobbit but was added to the movie because, in the words of one screenwriter, “You start to feel the weight of 13 hairy dwarves.”
(MORE: Why Pixar’s Brave Is a Failure of Female Empowerment)
I did not read The Hobbit or the Lord of the Rings trilogy as a child, and I have always felt a bit alienated from the fandom surrounding them. Now I think I know why: Tolkien seems to have wiped women off the face of Middle-earth. I suppose it’s understandable that a story in which the primary activity seems to be chopping off each other’s body parts for no particular reason might be a little heavy on male characters — although it’s not as though Tolkien had to hew to historical accuracy when he created his fantastical world. The problem is one of biological accuracy. Tolkien’s characters defy the basics of reproduction: dwarf fathers beget dwarf sons, hobbit uncles pass rings down to hobbit nephews. If there are any mothers or daughters, aunts or nieces, they make no appearances. Trolls and orcs especially seem to rely on asexual reproduction, breeding whole male populations, which of course come in handy when amassing an army to attack the dwarves and elves.
(MORE: Fall TV: Strong Female Characters Can Negate Negative Effects of TV Violence)
There are, no doubt, many who know the Tolkien oeuvre much better than I who will protest my complaint. “There are very few women, but those that there are have great power,” one such aficionado has reminded me. Others will point out that there are plenty of modern classics with hardly any female characters enjoyed by both boys and girls, from Tintin to The Muppets.
And then there is the argument that none of this should matter, that it’s not just fiction but fantasy after all. But Peter Jackson, the director of The Hobbit, has said, “To me, fantasy should be as real as possible. I don’t subscribe to the notion that because it’s fantastical it should be unrealistic. I think you have to have a sense of belief in the world that you’re going into, and the levels of detail are very important.” I should think that would include — especially in an intergenerational saga — something as important as the perpetuation of species, whether furry-footed or not.


Read more: http://ideas.time.com/2012/12/31/the-hobbit-why-are-there-no-women-in-tolkiens-world/#ixzz2Gq2Q6PKG

Tuesday, January 1, 2013

Cassini Maps - Cassinimaps - London Street Maps

Cassini Maps - Cassinimaps - London Street Maps

Rebirth of the Viking warship that may have helped Canute conquer the seas | Culture | The Guardian

Rebirth of the Viking warship that may have helped Canute conquer the seas | Culture | The Guardian

Rebirth of the Viking warship that may have helped Canute conquer the seas

11th-century troop-carrier Roskilde 6 emerges from the depths of history and heads for British Museum

• Interactive: Viking longboat Roskilde 6
Roskilde 6, the largest Viking warship ever
Timbers of Roskilde 6 Viking warship being fitted into the steel frame for display in Copenhagen and at the British Museum.
When the sleek, beautiful silhouette of Roskilde 6 appeared on the horizon, 1,000 years ago, it was very bad news. The ship was part of a fleet carrying an army of hungry, thirsty warriors, muscles toned by rowing and sailing across the North Sea; a war machine like nothing else in 11th-century Europe, its arrival meant disaster was imminent.
Now the ship's timbers are slowly drying out in giant steel tanks at the Danish national museum's conservation centre at Brede outside Copenhagen, and will soon again head across the North Sea – to be a star attraction at an exhibition in the British Museum.
The largest Viking warship ever found, it was discovered by chance in 1996 at Roskilde. It is estimated that building it would have taken up to 30,000 hours of skilled work, plus the labour of felling trees and hauling materials. At just over 36 metres, it was four metres longer than Henry VIII's flagship Mary Rose built 500 years later, and six metres longer than the Viking ship spectacularly recreated as Sea Stallion, which sailed from Scandinavia around Scotland to Dublin in 2007.
"This ship was a troop carrier," said Gareth Williams of the British Museum. It was built some time after 1025 when the oak trees were felled, and held 100 warriors taking turns on 39 pairs of oars if there was not enough wind to fill the square woollen sail. They would have been packed in tightly, sleeping as they could between the seats, with little room for supplies except a minimal amount of fresh water – or ale or mead, which would not have gone stale as fast – and dried salt mutton.
It would have been an uncomfortable journey, but short: they did not need to carry much as their ship could move startlingly fast – Sea Stallion managed an average speed of 5.5 knots, and a top speed of 20 knots. Once they landed, the warriors could forage with ruthless efficiency, as many a coastal community or wealthy monastery discovered.
The ship would probably not have come alone. "There are records in the annals of fleets of hundreds of ships," Williams said. "So you could be talking about an army of up to 10,000 men suddenly landing on your coast, highly trained, fit, capable of moving very fast on water or land." Such luxury ships were fabulously expensive to build and a devastating display of power, Williams said.
The dates suggest Roskilde 6 may have been built for King Canute, who according to legend set his throne in the path of the incoming tide, to prove to his courtiers that even a monarch could not control the force of nature. At the time the Vikings were consolidating their power from temporary raiders to permanent invaders.
With all the original timbers fitted into a steel frame that will recreate its full length and form, the ship will be the centrepiece of Viking, an exhibition opening at the Danish national museum in June, before being transported to London to launch the British Museum's new exhibition space in 2014. It will travel in two containers, by freighter and lorry.

Accident

The vessel was found by accident when an extension was being built to the Roskilde ship museum in Denmark, itself built to hold an earlier find of Viking ships that had been deliberately sunk to narrow the fjord and protect the approach to the town, the old royal capital of Denmark.
In 1996 archaeologists watching the construction work discovered huge timbers turned up in the new foundations, some already chopped in half by the piling. It proved to be a treasure trove of nine ships, of which Roskilde 6, almost half of which was recovered, was the most spectacular.
The timbers stayed in storage while the museum worked out what to do with the unexpected addition to its collection, until the exhibition provided the opportunity for full conservation.
The original Roskilde ships are spectacularly displayed in a purpose-built ship hall, but could never travel: the timbers look solid but might shatter like glass. When excavated, the sodden timbers of Roskilde 6 would have disintegrated into a heap of dust if left exposed to air. National museum conservator Kristiane Straetkvern managed the project, which has been drying timbers up to 10 metres long far more slowly than the older techniques, then replacing the lost moisture with synthetic resin, leaving them lighter but stable.
It was a nervous moment for her when some completed timbers were test assembled, each resting in a felt lined individually laser-cut support, in a frame that bolts together like a giant Meccano set, but that dismantles into hundreds of components for travelling.
The exhibition will display finds from across Scandinavia and from deep into the countries they penetrated wherever a river could carry their shallow draft ships – as far inland as Lichfield in England, deep into Russia, to Byzantium in the east, where Vikings fought as mercenaries on both sides, and beyond. Objects from 12 countries, including many recent finds, will demonstrate that Vikings were traders, farmers, fishermen, and superb craft workers in timber, bone and metal.
However the most spectacular single artefact will be the ship, a potent witness that the Vikings were also dreaded raiders.
The Roskilde team are now experts on recreating ancient ships, regularly commissioned to build them. One day they hope to recreate a full-size, ocean-going replica Roskilde 6, and send it across the sea to awe rather than to terrorise the coasts of the British Isles.